
What do you give the person who already has everything they need? Pie of course! Both my dad and Mr. U love strawberry rhubarb pie, so I make two every year for Father’s Day. One for each of them. Father’s Day is the perfect time to do this because the rhubarb is ripe. (I really should make two for Mr. U because I eat more than my share of it. Pie is one of my favorite desserts, especially with real whip cream on top.)
I don’t make pie very often for two reasons. One, it is loaded with fat and sugar, so we try not to indulge too frequently. And two, it is a long process to make. From start to finish, it takes me a good three hours. When I make pies, it is an event. Below is my ten-step process for making strawberry rhubarb pie. It just might help explain why it takes me so long.
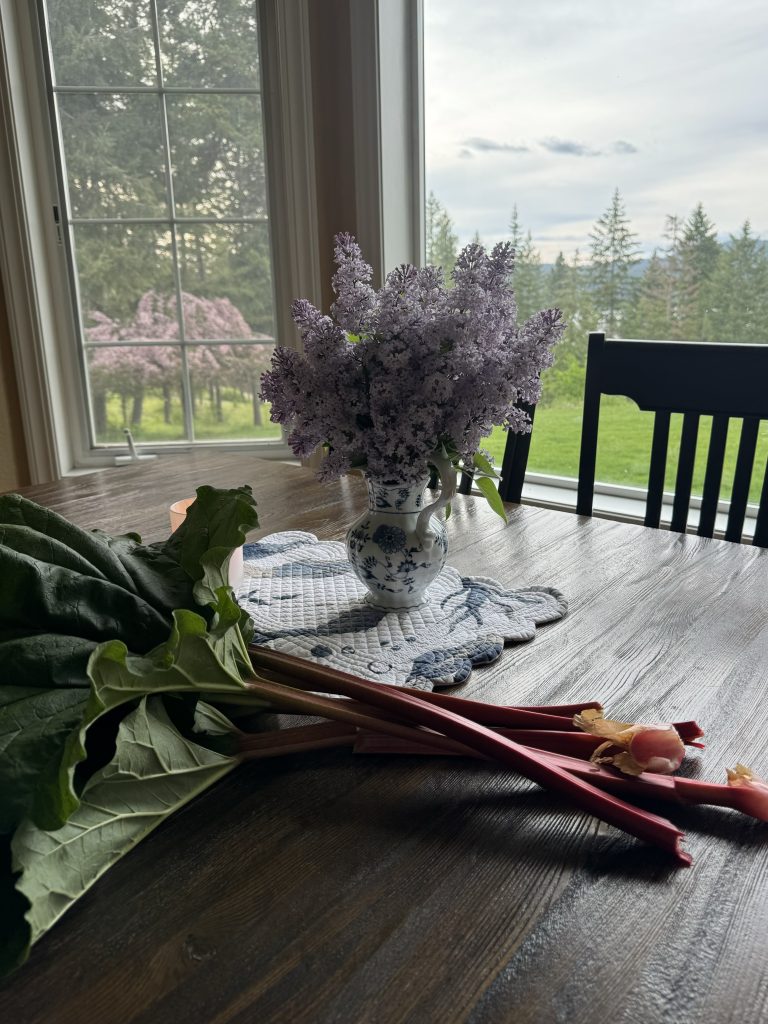
Step I: Pick a bouquet of fragrant, fresh lilacs and put them in a blue pitcher. Light a candle to set out on the counter. Tell Alexa to play some relaxing piano music. This sets the mood.

Step II: Go outside and pick rhubarb stalks. Clean and chop them up. Go back outside to get more stalks because I did not get enough the first time. Repeat. It always takes more than I expect.

Step III: Wash the store-bought strawberries because we can’t seem to grow more than three damn strawberries.
Step IV: Sing and dance to the music as I wash and slice the fruit. Technically, rhubarb is a vegetable, but who wants to say they put vegetables in their pie? Unless, of course, it is a meat pie.
Step V: Mix up the fruit filling and set aside.
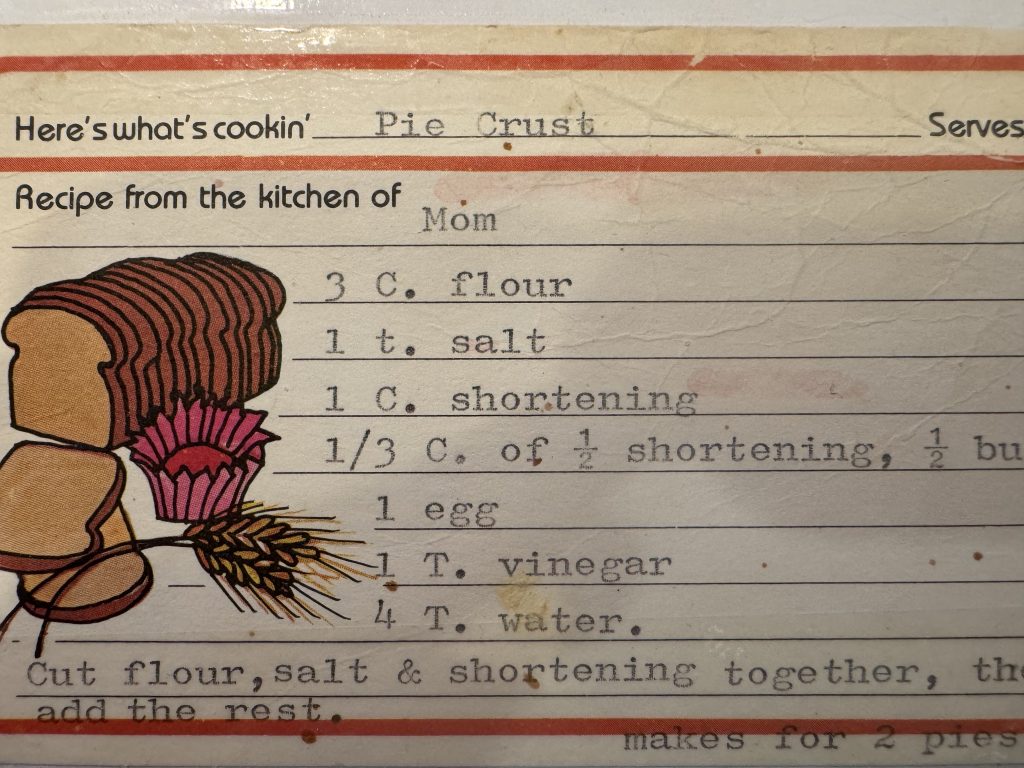
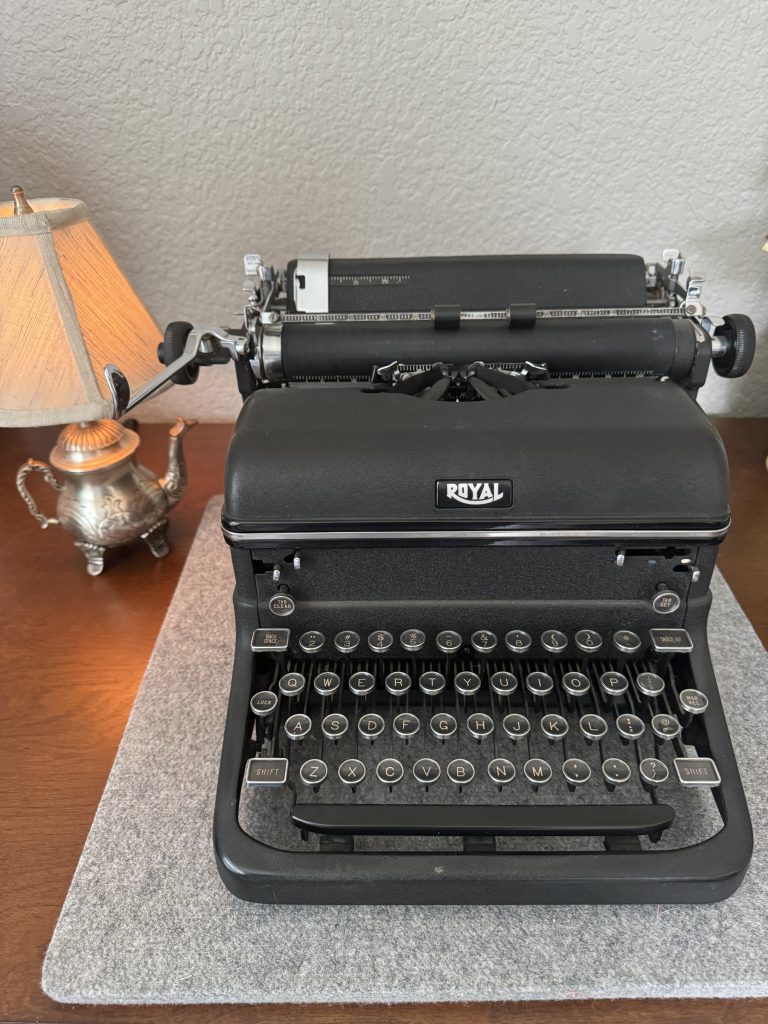
Step VI: Pull out my mom’s pie crust recipe that is typed on a recipe card using an old manual ink ribbon typewriter. The very one that I used to type letters for my dad for his business. (Typing was one of the most useful classes I ever took.)
Step VII: Feel sad and shed a tear because I miss my mom. She taught me how to make homemade pies, cookies and bread. She had two small bread pans that she would give me to make miniature loaves of bread while she made bigger family size loaves and cinnamon rolls.
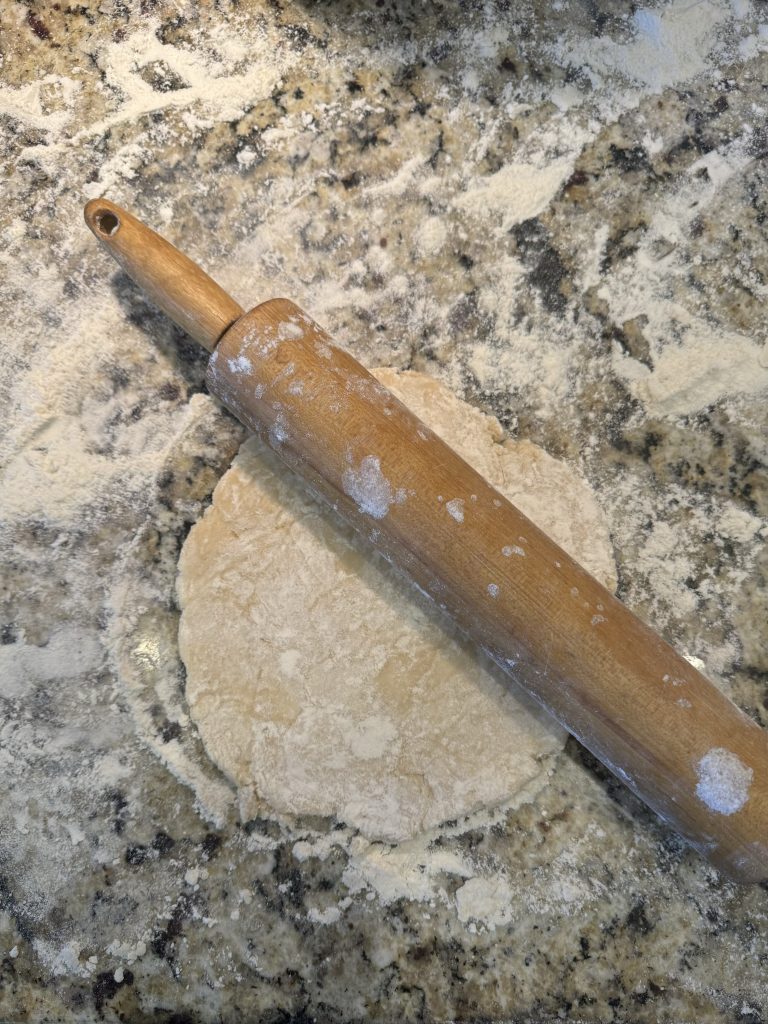
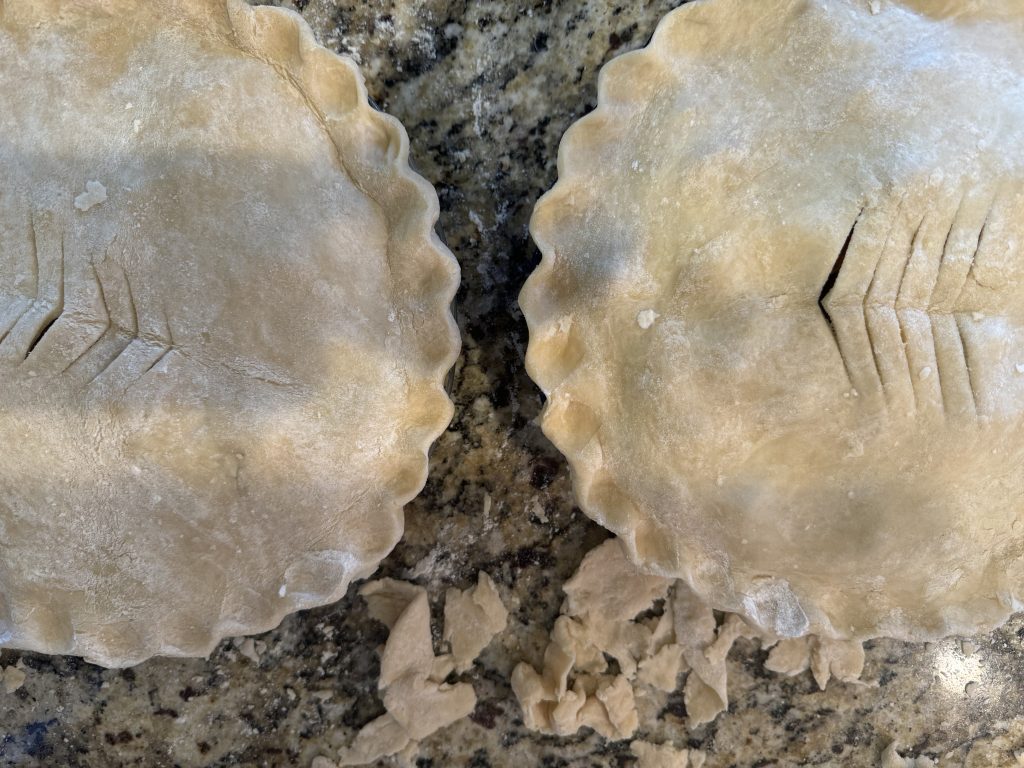
Step VIII: Cut together the ingredients for the crust. Once it is the perfect consistency (whatever that is), roll it, dust with flour, repeat. And repeat. And repeat. Get uneven edges and hopelessly try to repair them.
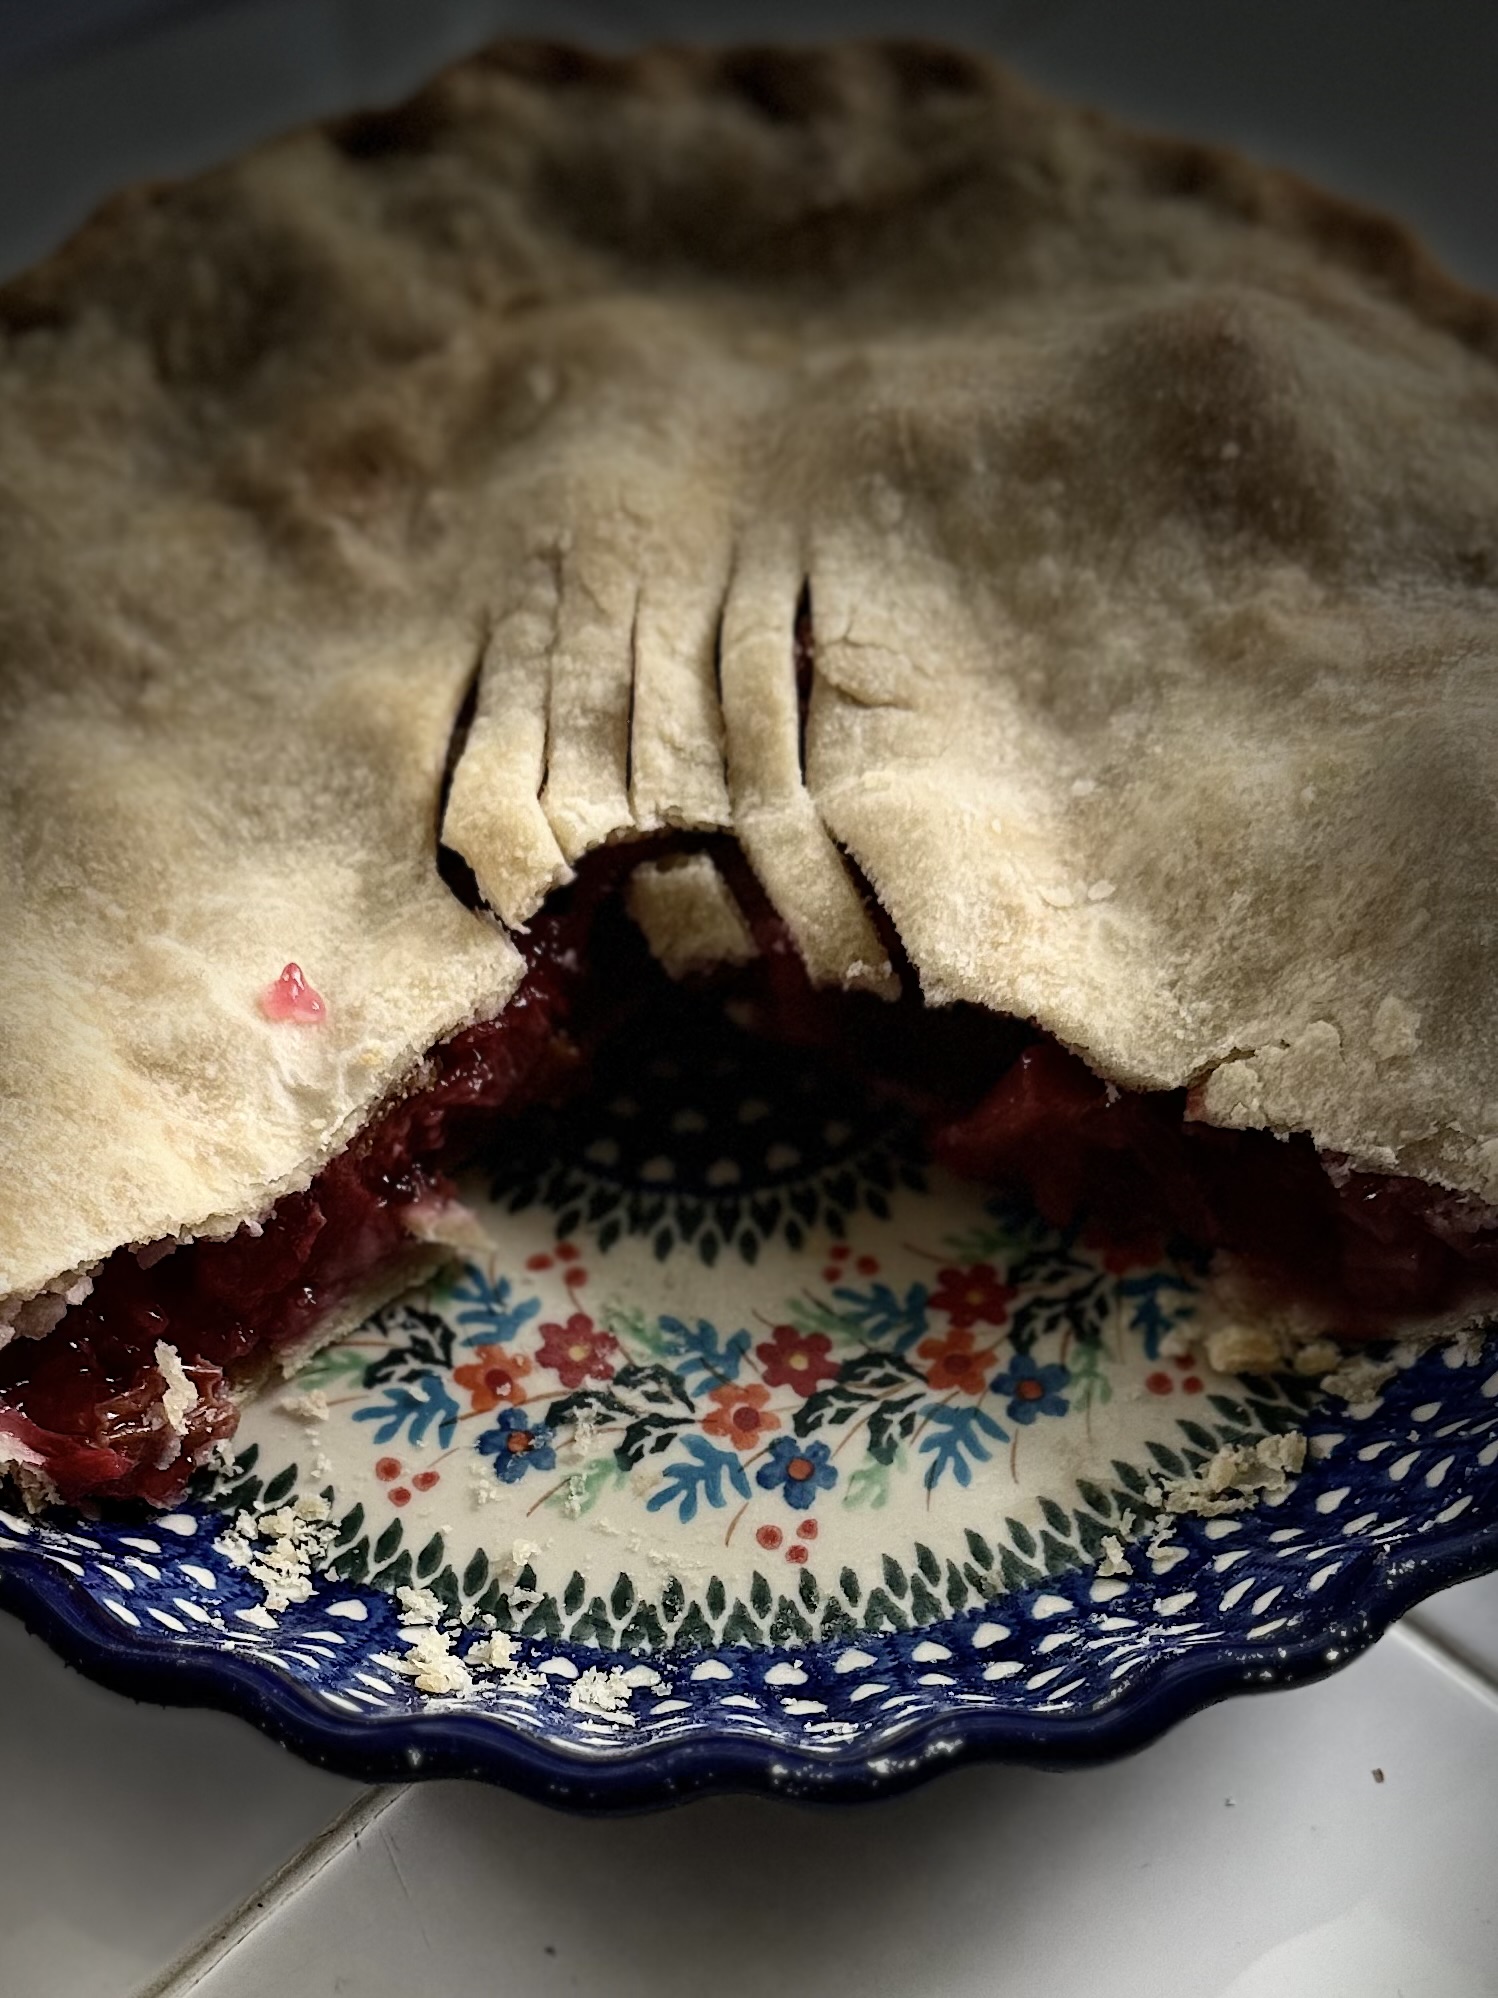
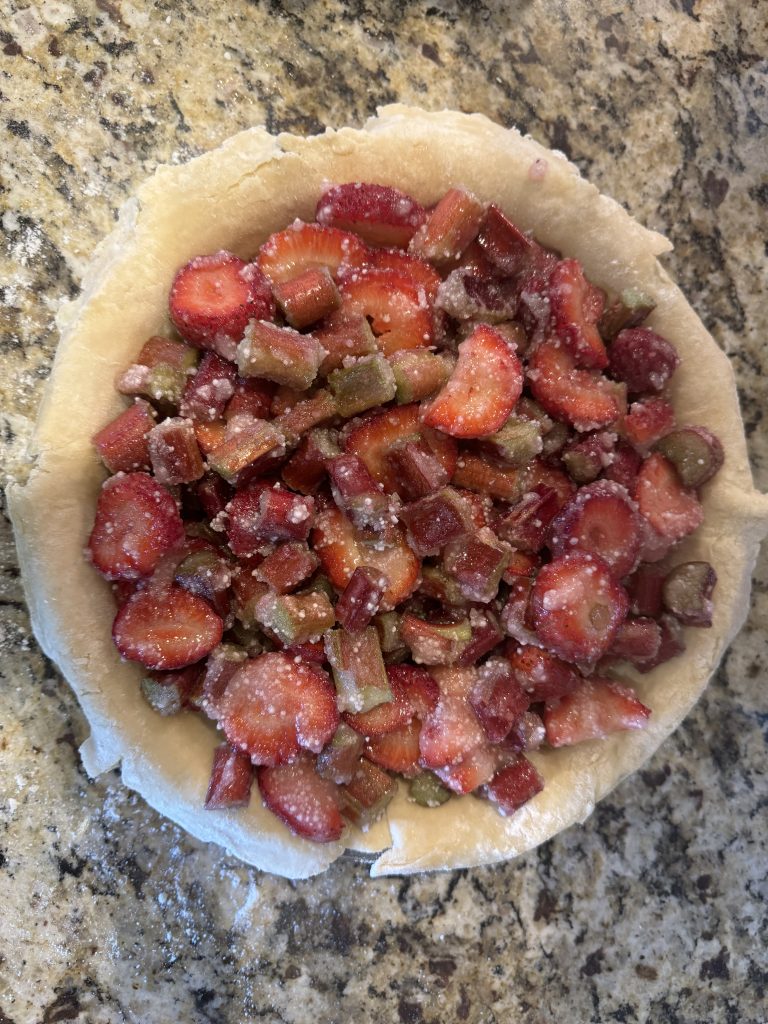
Step IX: Pull out my Polish Pottery pie plate that my mom gave me. Shed a few more tears. Layer the bottom crust, fruit and top crust. Forget to dab the fruit with butter, so gently pull the top crust back and do that.
Step X: Place the pies in the oven and sit back to smell them cooking. Until you realize that you forgot to put a drip pan under them and that all of the sweet juice is burning onto the bottom of your oven. Remember to clean oven later.
Now can see why making pies takes me a lot longer than the average person. It is an event, but well worth it when you pull them out of the oven and set them on the cooling rack. Better yet when you pour yourself a hot cup of coffee and take that first delicious bite of warm pie with cool fresh whip cream on top. Ahhh. Yes, well worth the effort.
Have a good week and happy baking!


